
Assembly
Step-by-step guidance for assembling your E1 handcycle. Built to be serviceable by any qualified technician.

This video provides a complete walkthrough of the assembly process. We recommend watching it in full before beginning your build. You can refer back to specific timestamps as you work through each step below.
Required Tools
Everything you need is available at your local hardware store or bike shop. No custom tools required.
Step-by-Step Assembly
Follow these steps in order for optimal assembly. Each step includes detailed technical drawings showing exact component placement and torque specifications.
Unboxing
Begin with the main frame components. All fasteners are labeled and color-coded for easy identification.
Wheel Mounting
Install the crankset, chain, and derailleur system. Proper alignment is critical for smooth operation.
Drawing will be added here
Seat Installation
Attach front and rear wheels. Ensure proper tension and alignment before tightening axle bolts.
Drawing will be added here
Footrest Adjustment
Mount the seat and backrest to your custom specifications. Adjust angle and position as needed.
Drawing will be added here
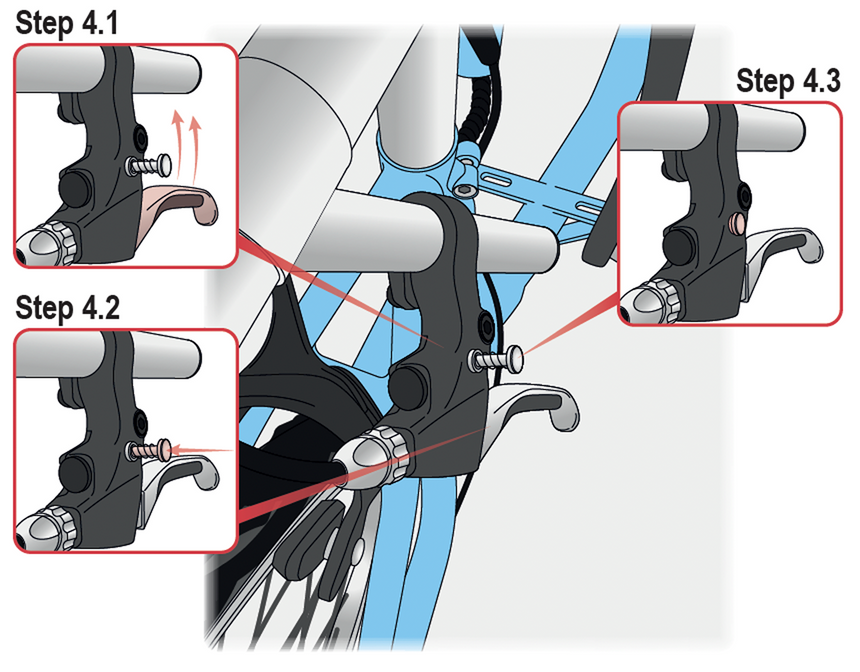
Pedal Attachment
Install handlebars, grips, and brake levers. Set rotation and reach to match your fitting measurements.
Drawing will be added here
E-Assist System
Fine-tune all components, check torque specifications, and perform safety inspection.
Drawing will be added here
Final Adjustments
Install handlebars, grips, and brake levers. Set rotation and reach to match your fitting measurements.
Drawing will be added here
Need Help?
We're here to guide you through any step of the assembly process!